Why Bay Area Homeowners Are Choosing ADUs
Understanding Your ADU Options: Types and Styles
Not every lot—or budget—calls for the same solution. Understanding the fundamental differences between ADU types is the first step toward a successful project. Here’s a condensed look at today’s most popular ADU formats in the Bay Area.
Detached vs. Attached
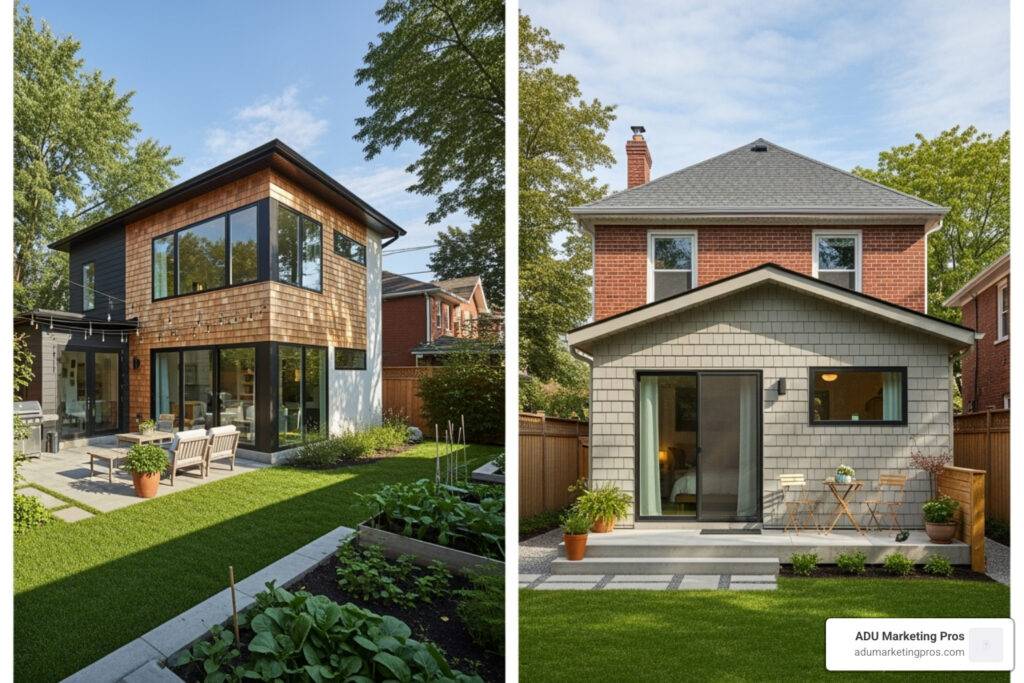
Detached ADUs are stand-alone backyard cottages (typically 400–1,200 sq ft) that provide maximum privacy for tenants and homeowners alike. This separation makes them the premier choice for generating rental income, as they function like a separate home. While they have higher construction costs due to needing a new foundation, four exterior walls, and separate utility runs, they offer the greatest flexibility and return on investment.
Attached ADUs share at least one wall with the primary residence, which can save 20–30% on foundation and utility work. They are an excellent solution for families housing aging parents or adult children, keeping them close while maintaining a degree of independence. They are also ideal for tighter lots where setback rules leave limited backyard space for a new structure.
Garage Conversions & JADUs
Turning an underused garage into a fully functional living space is a highly popular and cost-effective strategy. These projects can cost 40–60% less than building from scratch because the slab, framing, and often some utilities are already in place. With streamlined permitting in many cities, project timelines can drop to as little as three to six months.
Junior ADUs (JADUs) are the quickest and most affordable option. Created within the existing footprint of the main home, these units max out at 500 sq ft and typically involve converting a spare bedroom. They must have an exterior entrance and an efficiency kitchen, but can share a bathroom with the main house, further reducing costs. They are often approved in just a few weeks.
Prefab vs. Site-Built
Prefab ADUs are constructed in modules within a climate-controlled factory. This off-site process minimizes weather delays, reduces on-site construction time and disruption, and delivers highly predictable budgets. Once complete, the modules are trucked to the site and craned into place for final assembly and utility hookups.
Site-built ADUs are constructed entirely on your property using traditional methods. This approach allows for complete architectural freedom, from matching the exact style of your main home to creating custom footprints that follow odd-shaped setbacks. While they take longer (8–12 months), site-built ADUs are the superior choice for challenging lots or for homeowners with very specific design goals, like 20-foot sliding glass doors or unique rooflines.
For a deeper numbers dive, see our full ADU construction cost guide.
The ADU Building Journey: From Concept to Completion
Building an ADU is a marathon, not a sprint. It’s a multi-stage process that requires careful planning and expert execution. Knowing the route up front makes the entire trip smoother for everyone involved.
Phase 1 – Design & Feasibility
This initial phase is arguably the most critical. It begins with a thorough site assessment and feasibility study. For a modest fee (often around $500), a builder will analyze your property to confirm local zoning rules, setback requirements, utility capacity (sewer, water, electrical), and soil conditions. This step is crucial for avoiding five-figure surprises down the road, such as finding the need for a new sewer line or an upgraded electrical panel. During this phase, many leading design-build firms use 3-D modeling software to create detailed visuals, allowing homeowners to refine layouts, materials, and finishes before a single permit is filed.
Phase 2 – Permits & Regulations
Navigating the permitting process is often the most daunting part for homeowners. Every Bay Area city and county has its own unique playbook of regulations, fees, and submission requirements. This is where experienced adu builders bay area provide immense value. They maintain relationships with staff inside local planning and building departments, which helps them anticipate requirements and fast-track approvals. As the Terner Center’s Berkeley ADU report notes, approval times can range from a few weeks to over a year, depending on the jurisdiction and project complexity.
For a statewide overview of the latest rules, the California Department of Housing & Community Development (HCD) offers a free, downloadable ADU Handbook that many builders rely on as their regulatory “north star.”
Typical submittals include architectural plans, structural engineering calculations, energy compliance reports (Title 24), zoning review, building & safety review, and utility clearances. For some hillside or liquefaction-zone lots, geotechnical and soil reports are also mandatory.
Phase 3 – Construction & Inspections
Once permits are in hand, construction begins. For prefab units, the shell can often be installed in just one to three days, with the total project duration from start to finish hovering around six months. Custom, site-built units average eight to twelve months. The construction sequence is highly methodical and rarely changes: site preparation and grading → foundation pouring → framing and roofing → rough-in of plumbing, electrical, and HVAC → insulation and drywall → exterior and interior finishes → final inspections.
Throughout this phase, a series of municipal inspections will occur at key milestones to ensure all work is up to code. A pro tip from seasoned builders: schedule inspections as early as possible to avoid end-of-project bottlenecks, which can be especially severe during the rainy season when backlogs grow quickly.
Decoding the Bay Area ADU Cost

ADU pricing can look intimidating until you break it down into its core components. A transparent builder will provide a detailed estimate that separates these costs, giving you a clear understanding of where your money is going.
Key Cost Drivers
- Size & Type: This is the most straightforward factor. A 400-sq-ft studio costs significantly less to build than a 1,200-sq-ft two-bedroom unit. Likewise, a garage conversion will be less expensive than a new detached structure.
- Site Conditions: The state of your property plays a huge role. A flat, easily accessible lot is the ideal scenario. A sloped or hillside lot can swing budgets by 15–30% due to the need for extensive grading, retaining walls, and more complex foundations. Poor soil may require engineered fill, and limited access for heavy equipment can increase labor costs.
- Finish Level: Your taste in materials and fixtures directly impacts the price per square foot. Expect to pay $200–$300/sq ft for basic, builder-grade finishes (laminate counters, vinyl flooring), $300–$450/sq ft for mid-range options (quartz counters, hardwood floors), and $450+ for premium or luxury finishes (custom cabinetry, high-end appliances, designer tile).
- Soft Costs: These are the non-construction expenses that are essential to any project. They include architectural design fees ($15k–$40k), structural engineering ($5k–$15k), municipal and county permit fees ($5k–$25k), and potential utility connection and upgrade fees ($10k–$30k), especially if a new electrical panel or sewer lateral is required.
Typical Ranges
- Prefab studios (≈ 200 sq ft): $115k–$150k turnkey
- Prefab 2-bed (≈ 685 sq ft): $250k–$307k
- Site-built standard (≈ 800 sq ft): $250k–$400k
- High-end custom: $400k–$600k+
Median cost across Northern California is $177,500 (≈ $329 / sq ft).
Financing Made Simple
Home-equity loans, HELOCs, construction loans, and cash-out refinances are all common ways to fund an ADU. A major advantage is that many lenders now allow you to use projected rental income—roughly $26,400 annually on average in the Bay Area—to help you qualify for the loan. Furthermore, federal and state green-energy rebates for features like solar panels and heat-pump water heaters can reduce net project costs by 30–50%.
For strategies and lender contacts, see: ADU financing options.
How to Choose the Best ADU Builders in the Bay Area

A trustworthy builder is the single most important factor in a successful ADU project. The right partner saves you time, money, and countless headaches. Here’s a streamlined checklist for vetting potential builders.
Must-Have Services
- Design–build model: This integrated approach, where one firm handles both design and construction, ensures single-point accountability. It prevents the common problem of architects blaming builders and vice-versa, leading to a smoother process with better cost control.
- Permit management: Look for a builder with proven experience navigating the specific planning departments in your city and county. Their familiarity with local regulations is invaluable.
- Dedicated trade partners: A builder with in-house teams or long-term, trusted subcontractors for plumbing, electrical, and HVAC can maintain higher quality standards and stick to schedules more reliably.
- Transparent budgeting: Insist on a detailed, itemized budget with a clear schedule of milestone payments. Avoid builders who are vague about costs or ask for large upfront payments.
Questions to Ask Potential Builders
- How many Bay Area ADUs have you completed in the last 24 months?
- Can you walk me through your process from feasibility to final inspection?
- What is your typical project timeline, and what is your on-time completion rate?
- How do you handle unexpected issues or change orders during construction?
- Can I speak with three clients whose projects were similar to mine?
- Are you licensed with the CSLB and fully insured for both general liability and workers’ compensation? (Ask to see the certificates.)
- What specific warranties do you provide on workmanship and the structure itself?
Warranties & Post-Build Support
Reputable builders stand behind their work. Look for a minimum 10-year structural warranty and a comprehensive 1- to 3-year service warranty on workmanship. The best firms often include complimentary annual inspections and have clear, proactive processes for handling any warranty claims that may arise.
Tip: A builder’s responsiveness during the initial sales and vetting process is often a strong predictor of their communication style during construction. A team that is prompt, clear, and professional from the start is more likely to maintain that standard throughout the project.
Frequently Asked Questions about Building an ADU in the Bay Area
How much value will an ADU add?
Rental income of ≈ $2,200 per month is common. Property values typically rise 20–30 % of construction cost, with premium neighborhoods seeing even higher bumps.
What size can I build?
Most cities allow up to 800–1,200 sq ft for a standard detached ADU and 500 sq ft for a JADU. Setbacks are usually 4 ft, and height caps hover around 16–20 ft. Always confirm with local planning.
Can I DIY my ADU?
Owner-builder permits exist, but coordinating 40+ construction trades, inspections, and schedules is a full-time job. Unless you’re already a contractor, hiring an experienced ADU firm usually saves both money and stress.

Conclusion
An ADU can pay for itself in 7–10 years while adding long-term equity and flexibility—whether you need rental income, room for relatives, or a future home office. The secret to stress-free success is partnering with a builder who knows Bay Area regulations inside-out and communicates clearly from first site walk to final inspection.
For ADU construction and architecture firms looking to capture more qualified leads, ADU Marketing Pros—based in San Jose and serving the entire Bay Area—provides laser-focused SEO, PPC, and content strategies that spotlight your expertise instead of price. Ready to stand out in a booming market? Learn more at ADU Marketing Pros and find how targeted digital campaigns can keep your project calendar full year-round.