The ADU permit process is often seen as a labyrinthine journey, especially in California, where housing solutions are high on the priority list. However, the payoff is more than worth it. Accessory Dwelling Units (ADUs) present numerous benefits for both homeowners and communities.
- Extra Income: They offer a great way for property owners to earn additional income by renting out these units.
- Increased Property Value: ADUs can boost property values.
- Housing Solution: Amid California’s housing shortage, ADUs are a practical solution to increase housing availability without the need for new land development.
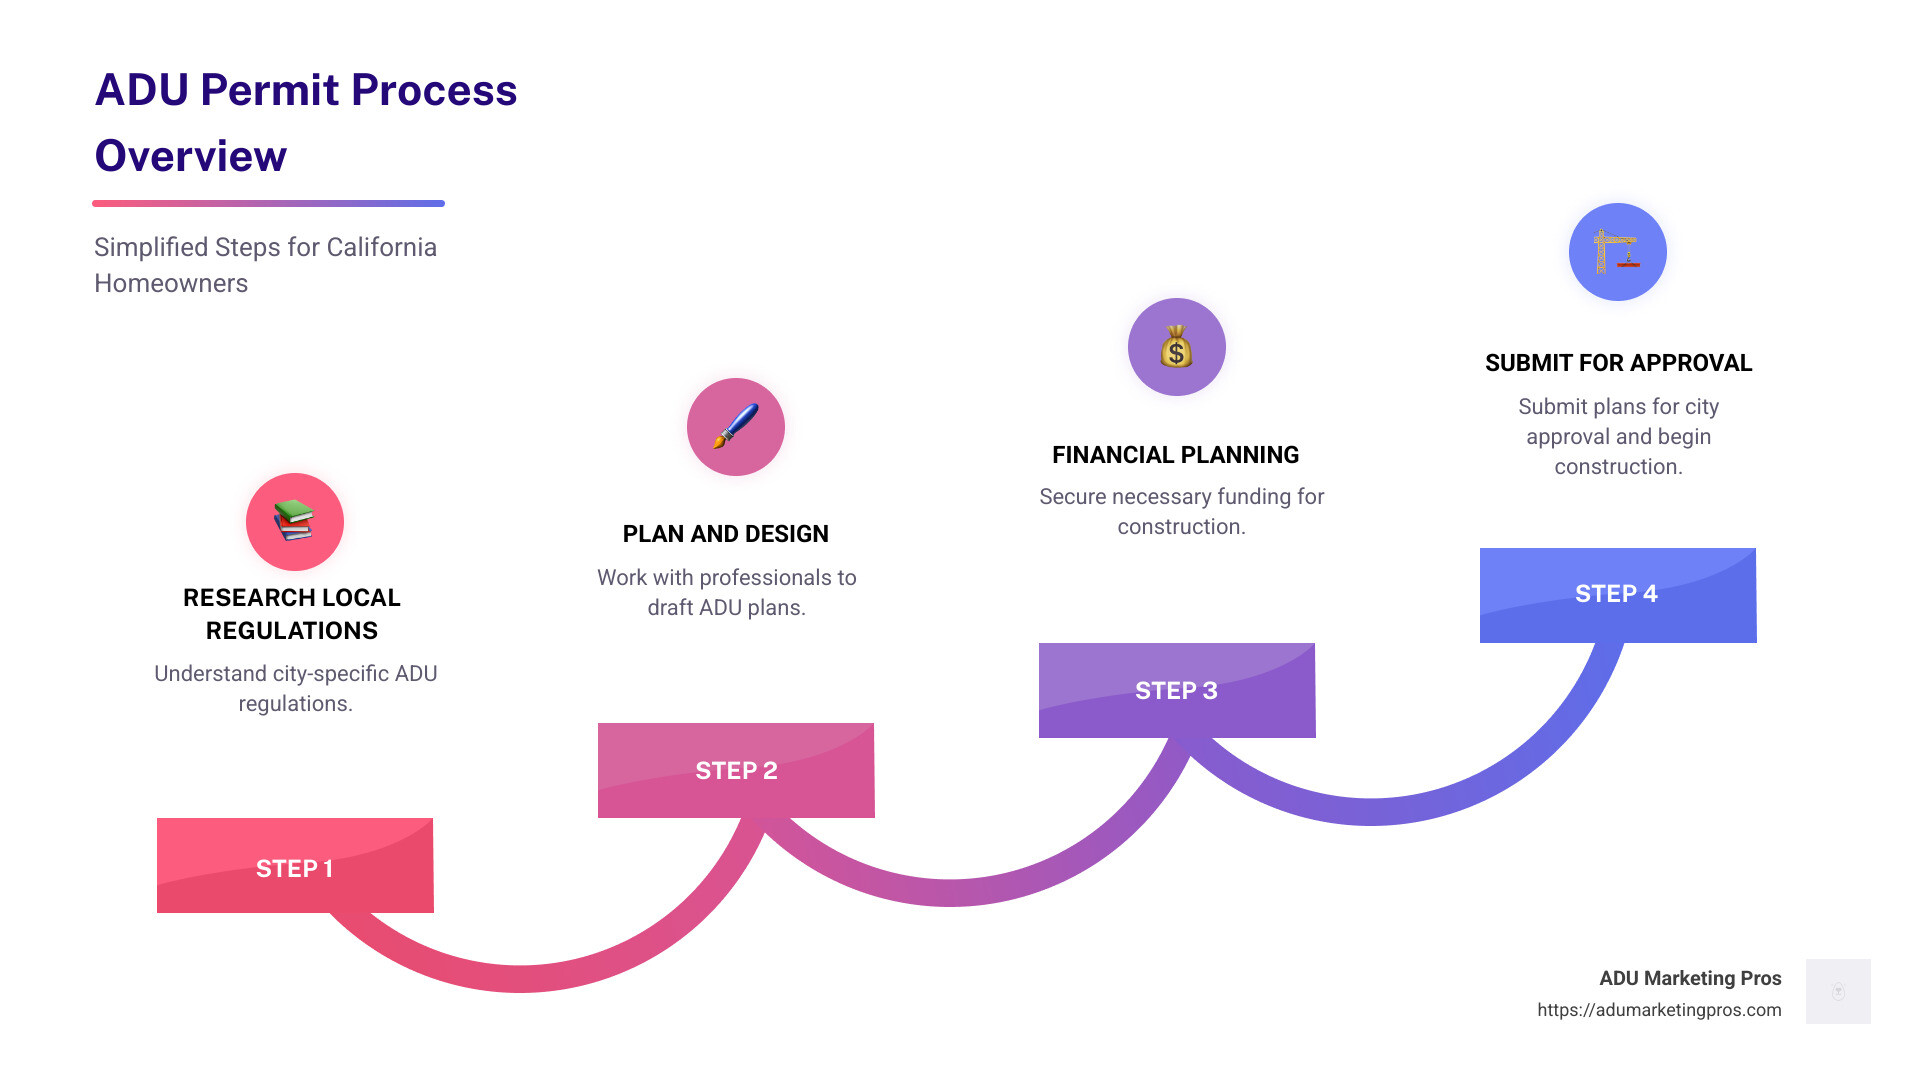
For those seeking a quick overview of the adu permit process in California:
- Research Local Regulations: Each city has its own ADU regulations.
- Plan and Design: Collaborate with a design professional to prepare ADU plans.
- Financial Planning: Secure necessary financing for your project.
- Submit for Approval: Submit your ADU plans for city approval.
- Construction and Inspection: Begin construction post-permit approval and get required inspections.
These steps form the backbone of the ADU journey, making it easier for homeowners and developers, like our ideal client Ava the ADU Innovator, to steer the process successfully.
Understanding the ADU Permit Process
Plan Submission and Initial Review
The ADU permit process begins with submitting your plans to the city. This step might seem daunting, but breaking it down makes it manageable.
1. Prepare Your Plans:
Work with a design professional to create detailed architectural drawings. These should include energy efficiency calculations to comply with Title 24 requirements. Energy efficiency isn’t just a box to check; it’s a crucial part of California’s sustainability goals.
2. Submit to the Plan Checker:
Your completed plans go to a Plan Checker, who will ensure they meet local building codes and regulations. This initial review is crucial. If your plans are incomplete or inaccurate, it can delay the process.
3. Pay Permit Fees:
Once your plans are accepted, you’ll receive an invoice for initial review fees. These fees vary by city and are typically a percentage of your project’s estimated value. Pay promptly to avoid delays!

Clearances and Resubmission
After the initial review, your plans must gain clearance from various city departments. Each department has its own set of checks to ensure everything is up to code.
1. Planning Department:
This department checks for zoning compliance, including lot size, setbacks, and height restrictions. Each city has unique zoning laws, so understanding local ordinances is key.
2. Bureau of Sanitation:
They ensure your plans meet waste management and sanitation requirements. This step is crucial for maintaining community health standards.
3. Water and Electric Utilities:
You’ll need clearance from these utilities to confirm that your ADU will not strain existing infrastructure. A letter from your water company stating flow data at the nearest hydrant is often required. Don’t skip this step; it can lead to significant delays!
4. Historic Preservation District:
If your property is in a historic district, additional approvals may be necessary to ensure that the ADU does not alter the character of the area.
Once all clearances are obtained, you may need to resubmit your plans with any required revisions. Each resubmission will undergo another review cycle.
Pro Tip: Stay organized and responsive throughout this process. Quick responses to city feedback can significantly speed up your timeline.
Navigating these steps might feel like a maze, but understanding the adu permit process and its requirements helps you move through it efficiently. Next, we’ll explore how zoning laws and regulations impact your ADU journey.
Navigating Zoning and Regulations
Zoning Requirements for ADUs
When building an ADU, understanding zoning laws and local ordinances is critical. These rules dictate what you can build and where. Let’s break down the essentials:
Lot Size and Setbacks
In 2024, California removed minimum lot size requirements for ADUs, making it easier for homeowners to add units. However, setbacks, which are the distances your ADU must be from property lines, remain. Typically, these are 4 feet for both side and rear yards. Always check with your local planning department for specific details.
Height and Size Restrictions
ADUs can be up to 16 feet tall and 1,200 square feet in size. However, if you’re planning a Junior ADU (JADU), it must be smaller, with a maximum size of 500 square feet. That power lines can limit your ADU’s height. So, ensure you account for this in your design.
Parking Requirements
Currently, there are no parking requirements for ADUs in California. This is a significant advantage, as it reduces the complexity and cost of your project. However, some local ordinances might impose additional rules, especially if your property is near public transit. Check your city’s specific regulations to ensure compliance.
Local Ordinances
Local governments can add their own rules on top of state laws. These might include architectural styles or additional environmental requirements. For instance, if your ADU is in a historic district, you might need extra approvals to maintain the area’s character.
Pro Tip: Zoning laws and ordinances can change, so it’s crucial to stay updated. Engage with your city’s planning department early in the process to understand all applicable rules.

By adhering to these zoning requirements and understanding local ordinances, you can steer the adu permit process with greater confidence. Up next, we’ll dive into financing options to make your ADU dream a reality.
Financing Your ADU Project
Securing Financing
Building an ADU can be a significant investment, but with the right financing options, it becomes much more manageable. Let’s explore some ways to fund your project.
Understanding Construction Costs
First, get a clear picture of your construction costs. These can vary widely depending on the size, design, and location of your ADU. On average, expect to spend between $100,000 to $200,000. This includes materials, labor, and permits.
Exploring Financing Options
-
Construction Loans
These loans are specifically designed to cover the costs of building an ADU. They provide funds in stages as your project progresses. Some lenders offer packages that include not just the loan, but also plans and construction services. -
Home Equity Line of Credit (HELOC)
If you have equity in your home, a HELOC can be a great option. It allows you to borrow against your home’s value, often at a lower interest rate than other loans. According to our research, this is the preferred choice for many homeowners. -
Personal Savings or Investments
Using personal savings or investments can help you avoid debt and interest payments. It’s a straightforward option if you have the funds available. -
Government Grants and Subsidies
California offers various grant programs for ADU projects. For example, the CalHFA ADU Grant Program provides financial assistance for low- to moderate-income households. Check local programs, like the Santa Cruz County ADU Forgivable Loan Program, which offers loans up to $40,000 for ADUs rented to low-income families. -
Joint Ventures or Partnerships
Partnering with an investor or developer can provide additional capital and expertise. This option works well if you plan to use your ADU as a rental property.
Pro Tip: Consult with financial advisors or lenders to determine the best financing option for your situation. Each has its pros and cons, so understanding them is key to making an informed decision.
By exploring these financing options, you can make your ADU project a reality without breaking the bank. Next, we’ll dive into creating and submitting architectural plans to get your project off the ground.
Creating and Submitting Architectural Plans
Handling Revisions and Approvals
Once you’ve secured financing, the next step in the ADU permit process is creating and submitting your architectural plans. This is where design professionals come in. These experts, like architects or engineers, will help you turn your vision into a set of detailed plans that meet all city requirements.
Design Professionals and Architectural Drawings
Hiring a skilled design professional is crucial. They will create architectural drawings that include everything from floor plans to structural details. These drawings should also incorporate energy efficiency measures as per Title 24 regulations. Your design professional will ensure that your plans align with local zoning laws, setbacks, and height restrictions.
The Permit Set
The permit set is a comprehensive package of all the necessary documents and drawings needed for city approval. It typically includes architectural, structural, and energy report drawings. Make sure your permit set is complete and accurate to avoid delays in the review process.
City Review Process
Once your permit set is ready, it’s time to submit it to the city. The initial review by city staff can take anywhere from 10 business days to a month. This review ensures your plans comply with all applicable building codes and safety standards. During this phase, your plans will be evaluated by various departments, including Planning/Zoning and the Fire Department.
Common Revisions
It’s not unusual for the initial design to require revisions. Common changes requested by the city might include structural modifications, adjustments to window sizing for egress, or clarifications on the plans. These revisions ensure that your ADU is safe and compliant with local regulations.
Permit Issuance
After addressing any requested revisions, your plans should be approved. This is when the city issues your building permit, allowing you to proceed with construction. You’ll need to pay all permit fees, including mechanical, plumbing, and electrical permits, before you can start building.
Navigating the city review process can be complex, but with the right preparation and a skilled design team, you can get through it smoothly. Next, we’ll explore the zoning requirements for ADUs, helping you understand how to steer local ordinances effectively.
Frequently Asked Questions about the ADU Permit Process
How long does it take to get an ADU permit?
The timeline for securing an ADU permit can vary widely. Typically, it can take anywhere from 3 to 6 months. The duration largely depends on how quickly you finalize your design and the workload of your city’s building department.
For instance, the initial review of your plans by city staff can take anywhere from 10 business days to a month. If revisions are needed, which is common, this back-and-forth can add another 5 business days to 2 weeks per round of revisions. Staying organized and responsive can help you move through the process more swiftly.
How much do ADU permits cost?
ADU permit costs are usually around 1% to 2% of the building valuation you provide in the permit application. For example, if you estimate your ADU will cost $100,000 to build, the permit fee might range from $1,000 to $1,500.
This fee is the final amount paid after your plans are approved. It doesn’t include other expenses like plan review fees or impact fees that may be required by different city departments involved in the approval process. These fees cover the cost of necessary building inspections by the city.
How long does it take to build an ADU?
Building an ADU can take anywhere from 4 months to 15 months. The construction timeline depends on several factors, including the size of the ADU and the materials used. Larger ADUs and those using high-end materials or custom features, like imported tiles or specialty windows, tend to take longer.
Fortunately, ADU permits are valid for 6 months to a year, and they can be extended with each building inspection. This provides some flexibility in managing the construction timeline.
Understanding these timeframes and costs can help you plan your ADU project more effectively. Next, we’ll dig into the zoning requirements for ADUs, providing insights into navigating local ordinances and regulations.
Conclusion
Building an Accessory Dwelling Unit (ADU) is a smart investment, but navigating the ADU permit process can be complex. That’s where ADU Marketing Pros comes in. We specialize in crafting targeted marketing solutions for ADU construction and architecture firms, helping them stand out in a crowded market.
Our expertise is not just in understanding the ADU landscape but in leveraging it to drive growth for your business. We focus on attracting high-quality leads, so you don’t have to compete on price with generic contractors. Instead, we position your firm as the obvious choice for clients who value expertise and quality.
Our approach is data-driven and custom. We use targeted SEO, PPC, and social media strategies to ensure your firm is top-of-mind for homeowners ready to invest in premium ADU projects. By continuously researching market trends and consumer behaviors, we adapt our strategies to meet the evolving needs of the ADU sector.
In a competitive market, the difference between success and failure is a strategic marketing approach. Partner with us to ensure consistent leads, strong brand recognition, and tangible growth.
Ready to take your ADU business to the next level? Explore our specialized marketing solutions here. Let’s build your brand and grow your business together.