Why the ADU Permit Application Process Matters for Your Project
The ADU permit application is the essential first step to legally building an accessory dwelling unit (ADU) on your property. Before a single shovel breaks ground, you must navigate your local jurisdiction’s approval process. This isn’t just bureaucratic red tape; it’s a critical framework designed to ensure your project is legal, safe, and a valuable asset for years to come.
Quick Answer: What You Need to Apply for an ADU Permit
- Development Permit: Confirms your ADU design meets all local zoning rules like size, height, and setbacks.
- Building Permit: Ensures your construction plans adhere to structural, health, and fire safety codes.
- Subtrade Permits: Separate permits for specialized electrical, plumbing, and mechanical (HVAC) work.
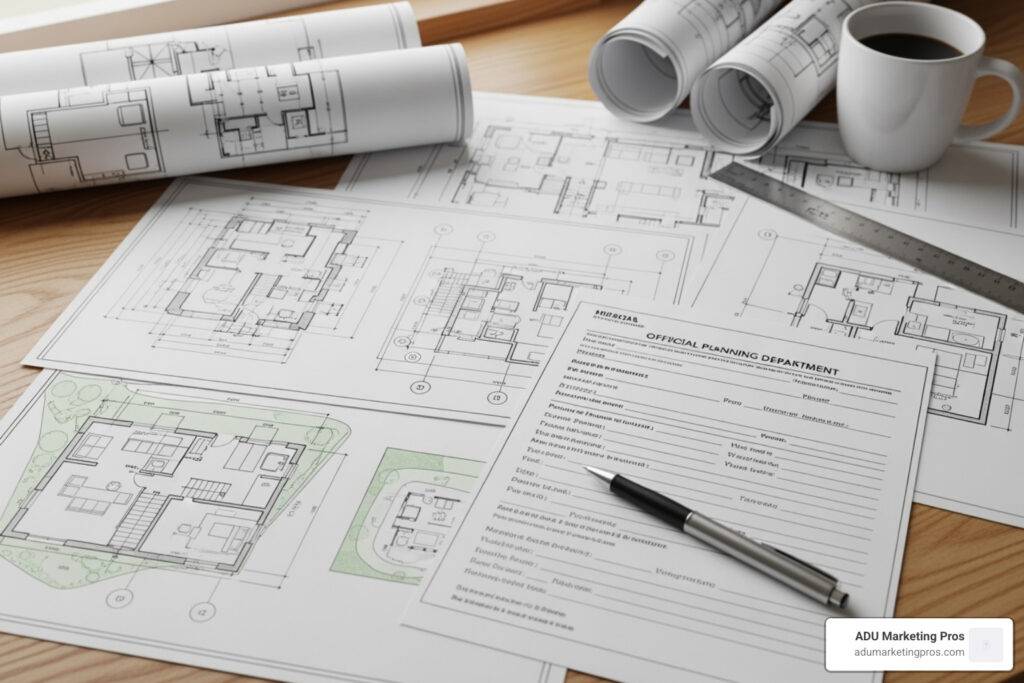
- Required Documents: A comprehensive package including site plans, floor plans, elevations, and structural drawings.
- Application Process: Submit your complete package through your city’s online portal, pay the required fees, and await a multi-departmental review (typically 2-6 months).
An ADU can add significant value to your property, creating flexible housing for family, generating substantial rental income, or simply boosting your home’s resale value. However, the path from concept to completion runs directly through your local planning and building departments. The process involves zoning maps, setback requirements, and multiple rounds of review, with requirements varying widely by city.
Failing to obtain proper permits is a high-stakes gamble. The consequences can be severe, ranging from stop-work orders and hefty fines to demolition orders for the unpermitted structure. You could also face double or triple permit fees to legalize the unit later, assuming it can even be brought up to code. The stakes are high, but the process is entirely manageable when you know what to expect.
This guide breaks down the entire ADU permit application process, from pre-application research and document preparation to submission, review, and final inspections. Whether you’re a homeowner embarking on your first major property improvement or a construction professional guiding clients, you’ll find the essential steps to move your project forward with confidence.

Understanding ADUs and Permit Fundamentals
Before diving into the specifics of the ADU permit application, let’s clarify what you’re building and why permits are absolutely non-negotiable for the safety and viability of your investment.
 within a primary home. - ADU permit application")
What is an ADU?
An Accessory Dwelling Unit is a complete, independent home located on the same lot as a primary single-family or multi-family house. To qualify as an ADU, it must contain its own full kitchen, bathroom, and sleeping area. Think of it as a self-contained living space where someone can live independently with all necessary facilities. Cities may use different names like granny flats, in-law units, or backyard cottages, but the core concept and legal requirements are the same.
Types of ADUs
Your choice of ADU type will directly influence the design, cost, and specific requirements of your ADU permit application.
- Detached ADU: A standalone structure, either newly constructed (“new build”) or prefabricated, that is separate from the main house.
- Attached ADU: An addition that is built onto the primary home and shares at least one wall.
- Junior Accessory Dwelling Unit (JADU): A compact unit, typically under 500 sq. ft., created within the existing footprint of a single-family home (e.g., in a spare bedroom). JADUs have unique rules, often requiring owner-occupancy of the main house and allowing for a more basic “efficiency kitchen.”
- Interior Conversion: Repurposing existing, underutilized space like a basement, attic, or large recreation room into a complete dwelling unit.
- Garage Conversion: A popular and often cost-effective option that transforms an attached or detached garage into a legal ADU.
Why You Absolutely Need a Permit
Building an ADU without a permit is a serious financial and legal mistake. The permit process is not designed to be an obstacle; it’s a system of checks and balances that protects you, future occupants, and your community. The process involves several key approvals:
- Development Permit (or Zoning Clearance): This is the first hurdle. It confirms your project complies with all local zoning laws, such as setbacks from property lines, maximum height, lot coverage, and parking requirements.
- Building Permit: This is the core approval. It ensures the structure itself meets stringent safety and construction standards for structural integrity, fire safety (e.g., fire-rated walls), energy efficiency, and sanitation.
- Subtrade Permits: These are separate, specialized permits for electrical, plumbing, and mechanical (HVAC) systems. This work must be completed by licensed professionals and pass rigorous inspections to ensure safety and functionality.
The permit process protects your investment by ensuring your ADU is built correctly, to code, and will be a durable, safe, and legal part of your property.
The Risks of Building Without a Permit
Skipping the ADU permit application process might seem like a way to save time and money, but it almost always leads to severe consequences:
- Hefty Fines: Municipalities can levy fines of $1,000 or more, often on a daily or weekly basis until the violation is corrected.
- Double or Triple Permit Fees: If you try to legalize an unpermitted unit later (a difficult and expensive process), you’ll likely pay punitive fees that are two or three times the standard rate.
- Order to Demolish: In the worst-case scenario, if the unit cannot be brought up to code, you could be forced to tear down the entire structure at your own expense.
- Insurance & Liability: Standard homeowner’s insurance policies will not cover unpermitted structures. If a fire, flood, or accident occurs, you are completely exposed financially. If a tenant is injured in an illegal unit, your personal liability could be catastrophic.
- Unsafe Construction: Without inspections, your ADU could have hidden and dangerous structural, electrical, or fire hazards, putting lives at risk.
- Financing and Resale Issues: An unpermitted ADU is a liability, not an asset. Lenders will refuse to finance a property with illegal structures, and appraisers will not assign any value to the unpermitted space, making it extremely difficult to sell or refinance your home.
The time and money spent on a proper permit are a small price to pay for a safe, legal, and valuable addition to your property.
Pre-Application: Laying the Groundwork for Success
The success of your ADU permit application hinges on thorough preparation. This critical phase is where you determine what’s possible on your property, establish a realistic budget, and design a compliant ADU before spending significant money on detailed plans.
Checking Zoning and Local Regulations
Before you even sketch a design, you must become an expert on your local ADU rules. This is the absolute foundation of your project.
- Zoning: Use your city’s online GIS map to find your property’s zoning district (e.g., R-1 for single-family residential). For example, Oakland, CA, provides an interactive zoning map for residents.
- State vs. Local Rules: Be aware of state-level laws that may override stricter local ordinances. California, for instance, has passed numerous laws to encourage ADU construction, mandating streamlined approval processes and limiting a city’s ability to block them. The California Department of Housing and Community Development (HCD) ADU Handbook is an essential resource.
- Key Development Standards: Dig into the specifics. You need to know the rules for:
- Setbacks: Minimum distance from property lines (front, side, and rear).
- Size and Height: Maximum square footage and height allowed.
- Lot Coverage: The maximum percentage of your lot that can be covered by structures.
- Parking: Many jurisdictions have eliminated parking requirements for ADUs, especially if they are near public transit.
- Owner-Occupancy & Rental Rules: Check for any requirements for the owner to live on the property and any restrictions on short-term rentals (like Airbnb).
Key Design and Construction Requirements
Your ADU design must adhere to multiple codes for safety, accessibility, and durability.
- Building Codes: Your design must meet all local and state building codes for structural loads, fire resistance, and safe egress.
- Energy Efficiency: In California, Title 24 mandates strict energy efficiency standards for new habitable spaces. This impacts your choice of insulation, windows, lighting, and HVAC systems. You may be required to install solar panels.
- Green Building: Many jurisdictions, including those in California, require compliance with the California Green (CALGreen) Building Standards Code. This involves measures for water conservation, sustainable materials, and indoor air quality.
- Utility Capacity: You must plan for connecting to water, sewer, and power. This may require a new, separate connection or upgrading the existing service to the main house. In some cases, a study may be needed to ensure the public main has enough capacity.
- Special Conditions: Properties in a Wildland Urban Interface (WUI) have stringent fire-resistance requirements for materials. Sound separation materials are often required for attached ADUs.
Budgeting for Fees and Other Costs
The cost of an ADU permit application is not a single charge but a collection of various fees that can add up quickly. Budgeting accurately prevents surprises.
, Typical Cost Range, and Basis (e.g., Flat Fee, % of Construction Value). - ADU permit application infographic")
Typical fees include:
- Plan Review & Building Permit Fees: Often calculated based on the construction value of your project.
- Subtrade Permit Fees: Fixed fees for electrical, plumbing, and mechanical permits.
- Impact Fees: These can be the most significant cost. They are charged to offset the new unit’s impact on public infrastructure like schools, parks, and roads. State laws in places like California have eliminated or drastically reduced impact fees for ADUs under 750 sq. ft.
- Utility Connection Fees: Costs charged by utility companies for connecting to water, sewer, and power.
In California, the ADU Grant Program offers up to $40,000 to help qualifying low-to-moderate-income homeowners cover these pre-construction costs.
The Value of a Pre-Application Meeting
We highly recommend a pre-application meeting with your city’s planning department. A planner can clarify requirements specific to your property, identify potential red flags early, and help you avoid costly redesigns. This small investment of time can save you thousands of dollars and months of headaches. Go prepared with a basic site plan and a list of questions.
The Step-by-Step ADU Permit Application Guide
Once your research is complete and your design is finalized, it’s time to assemble your documents and formally submit your ADU permit application. Meticulous organization and attention to detail during this stage are the keys to a smooth and timely review process.

Step 1: Assemble Your Required Documents
An incomplete application is the number one cause of delays. Your application package is a detailed story of your project, and every chapter must be included. While specific requirements vary, a standard submission will include:
- Completed Application Form: The official form from your city or county, filled out completely and accurately.
- Landowner Authorization: A signed form required if a contractor, architect, or designer is applying on your behalf.
- Site Plan: A detailed bird’s-eye view of your property showing the ADU’s location, dimensions, setbacks from all property lines, easements, topography/grade elevations, drainage, and locations of utility connections.
- Floor Plans: Dimensioned drawings of each level, showing room layouts, window/door sizes and locations, stair details, and locations of electrical outlets, switches, smoke detectors, and plumbing fixtures.
- Elevations: Exterior views (front, sides, rear) of the proposed ADU, specifying all exterior materials, finishes, colors, and roof pitch.
- Structural Drawings & Calculations: Plans and supporting calculations stamped by a licensed structural engineer. These demonstrate how the ADU will meet structural, wind, and seismic codes.
- Title 24 Energy Compliance Forms: Required in California to prove the ADU’s design meets state energy efficiency codes.
- Geotechnical (Soils) Report: Often required for projects on steep slopes, in landslide zones, or in areas with poor soil conditions.
- Other Documents: Depending on your project, you may also need a professional land survey, mechanical/plumbing/electrical drawings, a construction waste management plan (like Oakland’s WRRP), or a tree protection plan.
Step 2: Choosing Your Team: DIY vs. Hiring Professionals
Assembling the documents above is a complex task. You need to decide who will create them.
- Architects and Designers: An architect or experienced building designer is essential for creating a full set of compliant, buildable plans. They translate your vision into the technical language the city and your builder require.
- Structural Engineers: A licensed engineer is almost always required to produce the structural plans and calculations that guarantee the building’s safety.
- Permit Expediters: For a fee, these specialists manage the submission and communication process with the city. They are experts in local procedures and can help navigate revisions, saving you time and stress. Their value increases with project complexity.
- Owner-Builder Route: You can act as your own general contractor, but be aware of the risks. When you sign an Owner-Builder declaration, you assume full liability for the project, including workers’ compensation insurance for anyone you hire. This route is only recommended for those with significant construction experience.
Step 3: Complete and Submit Your Application Package
With your team chosen and documents assembled, you’re ready for submission.
- Online Portals: Most municipalities now use dedicated online portals for application submission. This requires uploading all documents as PDFs that meet specific file size and naming conventions. Double-check all requirements before uploading.
- Forms and Fees: Fill out the digital application forms with extreme care. A single incorrect address or contractor license number can cause a rejection. Fees are typically paid by credit card at the time of submission. Once you submit and pay, your ADU permit application is officially in the queue for review.
After You Apply: The Review and Inspection Process
Once your ADU permit application is submitted, the project enters a new phase of waiting, responding, and working with city officials. This stage requires patience, prompt communication, and a clear understanding of the steps leading to your final approval.

The Permit Review Timeline and Plan Check
After submission, your plans are routed to various departments for a process called “plan check.” Each department reviews the plans for compliance with their specific codes:
- Planning/Zoning: Verifies setbacks, height, lot coverage, and architectural standards.
- Building: Checks for structural safety, fire code compliance, energy efficiency, and accessibility.
- Public Works/Engineering: Reviews grading, drainage, and impacts on public utilities and sidewalks.
- Fire Department: Reviews access for emergency vehicles and fire-resistive construction details.
Typical processing times vary, but most homeowners should budget for a 2-6 month timeframe from submission to approval. Many cities offer online portals where you can track your application’s status as it moves through each department.
Handling Revisions and Resubmissions
It is very common to receive a “More Information Requested” (MIR) or “Corrections Required” notice. Do not be discouraged; this is a normal part of the process. The key is to respond quickly and completely.
- Understand the Comments: Review the city’s feedback carefully. If a comment is unclear, call the plan checker for clarification.
- Submit a Response Letter: Along with your revised plans, submit a formal letter that addresses each comment point-by-point, explaining how and where you have corrected the plans.
- Cloud the Changes: On your revised drawings, draw a “cloud” or bubble around every change you made. This helps the plan checker quickly find and approve your corrections, speeding up the resubmission review.
Permit Issuance and Construction Kick-off
Once all departments have approved your plans and all final fees are paid, you’ll receive your permit—the official green light to start construction. You will typically receive digital copies of your stamped, approved plans and a permit card.
Before any work begins, you must post the permit card in a visible location on the construction site (e.g., a front window or fence). Be aware that permits have an expiration date; you must typically begin work within 6-12 months. If you face delays, contact your city to discuss an extension before the permit expires.
Navigating the Inspection Process
Construction is monitored through a series of mandatory inspections to ensure your ADU is built safely and according to the approved plans. You or your contractor will need to schedule these inspections at critical stages.
Common inspection stages include:
- Foundation and Footings: Inspector checks trench depth, width, and rebar placement before concrete is poured.
- Under-slab Plumbing/Electrical: All pipes and conduit in the ground are inspected for proper installation before the foundation slab is poured over them.
- Framing: A crucial inspection to check the structural integrity of walls, floors, and roof, including nailing patterns, shear walls, and window/door headers.
- Rough-in (Electrical, Plumbing, Mechanical): Before drywall is installed, an inspector verifies all wiring, piping, and ductwork is correctly and safely installed within the walls.
- Insulation: Verifies that the correct type and amount of insulation have been installed to meet energy codes.
- Drywall and Fire-Resistive Construction: Checks fire-rated drywall installation and any other fire safety measures.
- Final Inspection: A comprehensive review of the completed ADU to ensure all work is finished, safe, and ready for occupancy.
Final Approval and Certificate of Occupancy
After passing the final inspection, you will receive a Certificate of Occupancy. This is the most important document of all. It officially declares the ADU a legal and habitable dwelling. It is illegal for anyone to move in or for you to rent the unit until this certificate is issued. With this certificate in hand, your ADU is complete, legal, safe, and ready for use.
Frequently Asked Questions about the ADU Permit Application
Navigating the ADU permit process for the first time can bring up many questions. Here are answers to some of the most common ones.
How much does an ADU permit application cost?
This is one of the most common questions, but there’s no single answer. The total cost varies significantly by location and project scope. It’s not one fee but a collection of charges, including:
- Plan Review & Building Permit Fees: Often based on a percentage of the project’s construction value.
- Subtrade Permits: Flat fees for electrical, plumbing, and HVAC.
- Impact Fees: Fees for schools, parks, and public infrastructure. These can be substantial but are often waived in states like California for ADUs under 750 sq. ft.
- Utility Connection Fees: Can range from hundreds to many thousands of dollars, depending on whether you need a new service line.
Expect to pay anywhere from $5,000 to over $20,000 in total permit and fee costs, depending on your jurisdiction and project size. California’s ADU Grant Program can provide up to $40,000 to help qualifying low-to-moderate-income homeowners with these pre-construction costs.
How long does the ADU permit process take?
While it varies, a realistic timeline is two to six months from initial submission to permit issuance. In some busy jurisdictions, it can take longer. The biggest factors influencing your wait time are:
- Application Completeness: Incomplete or inaccurate applications are the #1 cause of delays. A thorough, professionally prepared submission is the fastest path forward.
- Project Complexity: A simple garage conversion will likely be approved faster than a new, two-story detached ADU on a sloped lot.
- City Workload: Your local permit department’s current backlog and staffing levels can significantly affect your timeline.
- Your Responsiveness: How quickly you respond to correction notices will directly impact your total wait time.
Always check your city’s website for posted processing time estimates, but treat them as a best-case scenario.
What are the biggest challenges with an ADU permit application?
Homeowners most often face a few common hurdles. Being prepared for them can make the process much smoother.
- Incomplete Documentation: Missing plans, calculations, or forms will bring your review to an immediate halt. Use a detailed checklist and consider hiring a professional to manage the package.
- Zoning Non-Compliance: Designing an ADU that violates setback, height, or lot coverage rules is a costly mistake that requires redesigns. Triple-check all zoning regulations before you start designing.
- Unforeseen Site Conditions: Issues like unstable soil, a high water table, or hidden utility lines can force last-minute changes and add costs. A thorough site assessment, including a geotechnical report if needed, can minimize these surprises.
- Navigating Revisions: Responding to technical plan check comments can be confusing. An experienced architect, designer, or permit expediter is invaluable for interpreting feedback and submitting corrected plans efficiently.
Can I use pre-approved ADU plans from the city?
Yes, many cities now offer a gallery of pre-approved or “permit-ready” ADU plans, often for a low cost or for free.
- Pros: These plans have already been reviewed by the building department, which can significantly speed up the permit process and reduce design costs.
- Cons: Your customization options are limited or non-existent. You will still need to hire a professional to create a site-specific plan showing how the pre-approved design fits on your property, and you’ll still need to go through the full submission and inspection process. They are a good option if you find a design you love and your lot is straightforward.
What’s the difference between an architect and a permit expediter?
These are two distinct roles that can both be valuable.
- An architect or building designer is a creative and technical professional who designs the ADU. They create the detailed blueprints (floor plans, elevations, etc.) that define what will be built.
- A permit expediter is a logistical specialist. They don’t design the building; they manage the process of submitting the plans to the city. They are experts in local bureaucracy, forms, and communication, ensuring the application package is correct and navigating any issues that arise during the review. Many architecture firms offer this as part of their service, while others focus only on design.
Conclusion
We’ve journeyed through the entire ADU permit application process, from understanding the fundamental definitions and risks to receiving your final Certificate of Occupancy. While the path can seem complex and laden with technical details, it is entirely manageable with careful planning, thorough research, and meticulous attention to detail.
The key takeaway is that due diligence is everything. A successful ADU project is built on a foundation of solid pre-application research. Understanding local regulations, assembling a complete and accurate set of documents, and methodically following each step will save you from the costly mistakes and frustrating delays that can derail a project. The permit process is not an obstacle but a crucial safety net, ensuring your significant investment is legal, safe, insured, and built to last.
For ADU builders and architects navigating today’s competitive market, mastering the permit process for your clients is a key differentiator. But to win those clients, you need to reach the right homeowners at the right time with the right message. That’s where specialized marketing makes all the difference. ADU Marketing Pros focuses exclusively on helping ADU construction and architecture firms attract high-quality leads and grow their businesses. We develop targeted digital strategies that educate homeowners about the benefits of ADUs and showcase your expertise in navigating the complex journey from design to permitting to final construction.
Whether you’re a homeowner starting on your first ADU project or a professional looking to scale your business, the permit application is your gateway to success. Take it one step at a time, and your new ADU—and the opportunities it brings—will be well worth the effort.
Ready to take the next step? Learn more about growing your ADU business with our guide to ADU Garage Conversions.