Changing Your Underused Space into Income
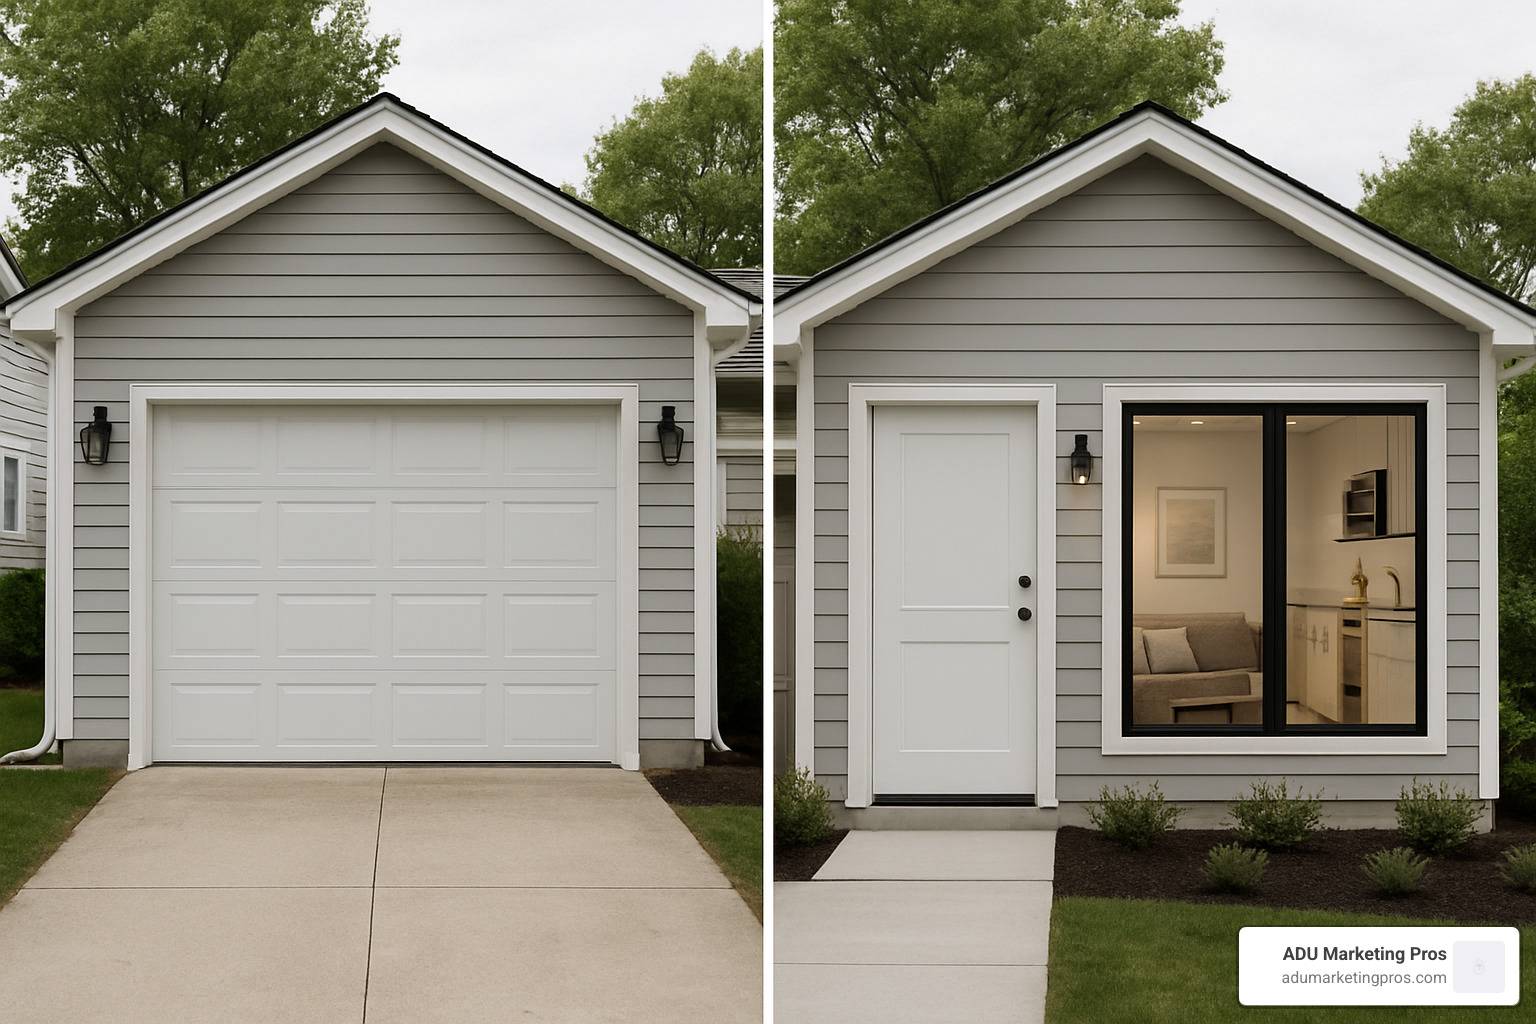
Garage to ADU conversion is the process of changing an existing garage into a fully functional Accessory Dwelling Unit with its own entrance, kitchen, bathroom, and living space. If you’re considering this project, here’s what you need to know:
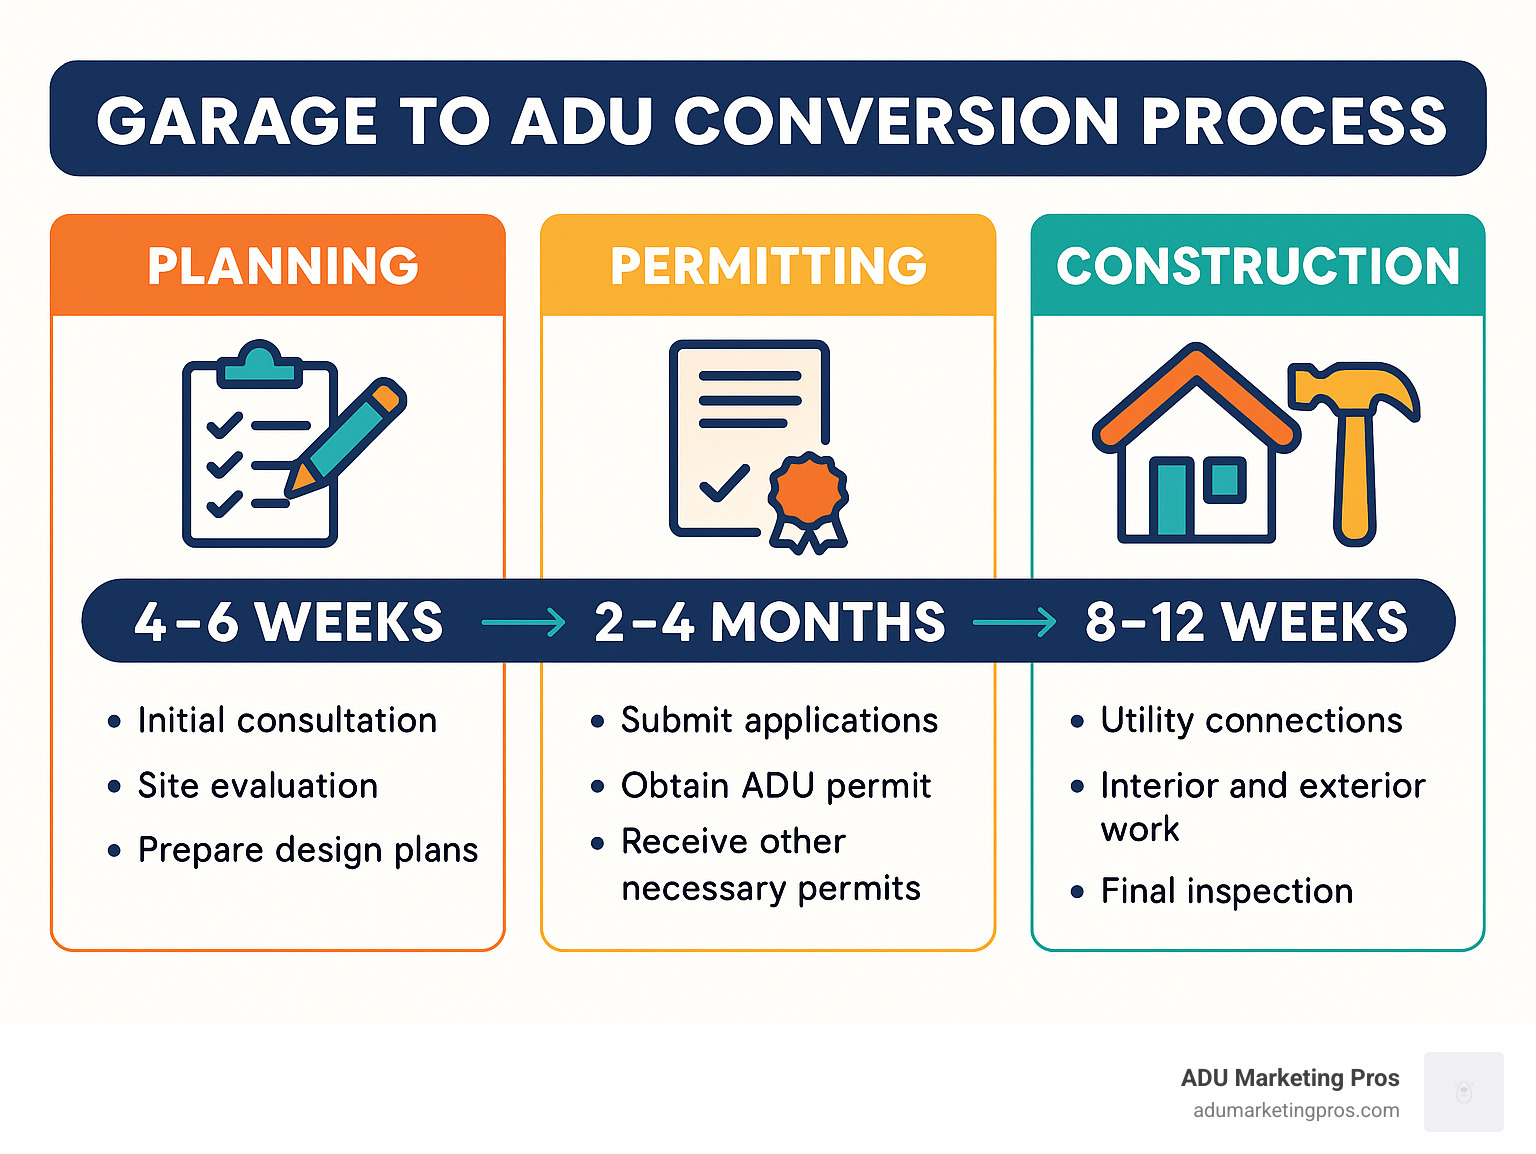
- Timeline: Typically takes 3-6 months from planning to completion
- Cost Range: $100,000-$165,000 for a standard conversion in California
- ROI Potential: Can recoup costs in 5-7 years through rental income
- Permits Required: Building, electrical, plumbing, and ADU-specific permits
- No Replacement Parking: California law no longer requires replacement parking for garage conversions
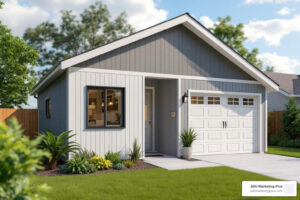
“That can’t be my garage!!” is often the reaction homeowners have when seeing their transformed space. And it’s no wonder—garage conversions are the most affordable way to create an ADU, with costs starting around $100,000 compared to $240,000+ for a new detached unit of similar size.
Converting your garage into an ADU offers multiple benefits: additional living space for family members, potential rental income (some units generating $1,300-$3,500 monthly), and increased property value without sacrificing yard space.
Unlike building from scratch, garage conversions leverage existing foundations, walls, and roofs—saving both time and money. In California, state laws have made this process easier by eliminating replacement parking requirements and streamlining permit approvals.
Whether you’re looking to house aging parents, create a home office, or generate rental income, a garage conversion might be the perfect solution. The process involves structural evaluation, permitting, design, and construction—each step requiring careful planning but offering substantial rewards.
Glossary for garage to ADU conversion:
– ADU building requirements
– ADU construction near me
– architect PPC campaigns
Understanding Garage Conversion ADUs
Changing your underused garage into a livable space isn’t just a smart home improvement—it’s potentially one of the most valuable investments you can make in today’s housing market. A garage to ADU conversion takes your existing structure and reimagines it as a complete living unit, leveraging what you already own to create something entirely new.
Unlike starting from scratch, these conversions work with your garage’s existing foundation, walls, and roof—which is why they typically cost 40-50% less than building a new detached ADU. For homeowners in California and increasingly across other states, these conversions represent a practical solution to housing shortages while offering a path to generate meaningful income.
When considering your garage to ADU conversion, you’ll encounter two main options:
A Full ADU gives you a complete, independent living space with its own kitchen, bathroom, living area, and private entrance. You can convert your entire garage (and in some areas, add up to 150 extra square feet) to create a spacious, self-contained unit that functions like a small house.
Alternatively, a Junior ADU (JADU) offers a more compact solution (maxing out at 500 square feet) that might share some facilities with your main home. These smaller units come with different requirements but can be perfect for specific situations.
Both attached and detached garages make excellent candidates for conversion, though each presents unique considerations. Attached conversions blend more seamlessly with your home but require thoughtful planning for sound isolation and privacy. Detached conversions offer more independence and separation but might need additional utility connections to function properly.
What could you do with your new space? The possibilities are nearly endless. Many homeowners create rental units that generate substantial monthly income—anywhere from $1,300 to $3,500 in major California cities. Others create comfortable living quarters for aging parents or adult children who want independence without the full cost of separate housing. Home offices, creative studios, guest accommodations, or flexible spaces that adapt to your family’s changing needs are all popular choices.
The financial benefits can be substantial. Our research shows that a $100,000 garage to ADU conversion that generates rental income could yield approximately $1.5 million over 30 years—an impressive 15x return on your investment. Even without renting, the added living space significantly boosts your property’s market value.
Garage ADU or JADU—Which Fits Your Goals?
Deciding between a full ADU and a Junior ADU for your garage to ADU conversion depends largely on your specific situation and long-term objectives. Let’s break down the key differences to help you choose.
When it comes to size, full ADUs can use your entire garage footprint and sometimes expand beyond it (up to 150 additional square feet in some areas). JADUs, however, must stay under 500 square feet, making them suitable for smaller garages or partial conversions where you want to preserve some garage space.
Kitchen requirements also differ significantly. Full ADUs need complete, independent kitchens with standard appliances, while JADUs can function with efficiency kitchens featuring smaller appliances and potentially sharing some utilities with the main house.
Perhaps the most important distinction involves who lives where. As of 2023, California generally doesn’t require property owners to live on-site for full ADUs (though this may change after 2024 and varies by location). JADUs, however, typically come with owner-occupancy requirements—meaning you’ll need to live either in the main house or in the JADU itself.
A JADU might be your best bet if you have a smaller garage, plan to stay on the property, want a simpler conversion process, or need to keep costs down. These conversions typically start around $80,000—notably less than full ADU conversions.
Choose a full ADU if you need more space, want maximum rental flexibility (including possibly renting both your main house and the ADU), seek higher rental income potential, or prefer complete separation between living spaces. These projects usually start around $100,000 but offer more versatility and potential return.
Benefits That Outshine New Builds
When comparing a garage to ADU conversion with building a new ADU from scratch, the advantages of conversion become clear—and they extend far beyond mere convenience.
The cost difference is substantial. While a 400-square-foot garage conversion in Southern California typically starts around $130,000, a similar-sized new detached ADU can easily reach $240,000 or more. By using your existing structure’s foundation, framing, and roof, you’re eliminating many of the most expensive components of new construction.
Time savings are equally impressive. Most garage conversions wrap up in 3-6 months, while new detached ADUs often take 9-14 months from start to finish. Fewer construction elements mean fewer opportunities for delays due to weather, supply chain hiccups, or contractor scheduling challenges.
Perhaps the most valuable advantage involves setback exemptions. Existing garage structures are typically grandfathered in regarding how close they can be to property lines, even if they wouldn’t meet current requirements for new construction. New ADUs usually require minimum setbacks of 4 feet from property lines—a restriction that can severely limit building options on smaller lots. Even if your garage needs substantial rebuilding, maintaining the original footprint often allows you to keep these valuable setback exceptions.
The tax benefits shouldn’t be overlooked either. Under California’s Proposition 13, garage conversions typically add less to your property tax bill than new construction because only the improvements (not the existing structure) are reassessed. Your main home keeps its existing tax basis, with the ADU improvements blended in. If you rent the unit, you may also qualify for depreciation and other rental property tax deductions.
A garage to ADU conversion preserves your precious outdoor space—particularly valuable in urban areas where yards are already limited. Unlike new construction that consumes garden or play areas, conversions work with space you’ve already dedicated to structure.
Finally, many jurisdictions offer streamlined permitting specifically for garage conversions, with faster approvals and lower fees. Some cities even provide pre-approved plans for these projects, further simplifying what can otherwise be a complex process.
As housing costs continue climbing across California, changing your underused garage into valuable living space represents one of the smartest investments you can make in your property—delivering benefits that new construction simply can’t match.
Planning & Permitting for a Garage to ADU Conversion
The planning and permitting phase is where your garage to ADU conversion dream begins to take shape. This foundational stage ensures your project will be legal, safe, and built to last. Think of it as laying the groundwork for your future rental income or family living space.

Before you start picking out paint colors or imagining furniture layouts, you’ll need to steer some important technical considerations. First, check your property’s zoning. While California generally welcomes ADUs on single-family properties these days, some neighborhoods have special overlay zones or historic designations that might affect your plans.
One of the biggest perks of converting your existing garage? You typically don’t have to worry about those pesky setback requirements as long as you keep the same footprint. Your garage might be closer to property lines than would be allowed for new construction, but conversion projects get to maintain those existing dimensions. If you do decide to expand beyond the original garage footprint, just remember that any new portions will need to comply with current setbacks (usually at least 4 feet in California).
Here’s some great news for California homeowners: as of 2020, you no longer need to provide replacement parking when converting your garage. This change has been a game-changer for many homeowners who previously couldn’t imagine losing their parking spaces.
Your new living space will need to meet California’s Title 24 energy efficiency standards. This means proper insulation in your walls, floors, and ceilings, plus energy-efficient windows and lighting. While this might seem like a hurdle, it actually ensures your conversion will be comfortable and have reasonable utility bills.
Fire safety is another crucial consideration. Your local fire department will look at how far your ADU is from street access (usually needs to be within 150-200 feet), whether you need fire-rated walls if you’re close to property lines, and whether sprinklers are required. In most cases, if your main house doesn’t have sprinklers, your ADU won’t need them either.
Before you get too far into the process, it’s worth having a structural engineer take a look at your garage. They’ll evaluate whether your foundation is adequate (it might need underpinning to reach 12-24 inches below grade), check the integrity of your walls and roof, and determine if you need seismic reinforcements. This early assessment can save you from unpleasant budget surprises later on.
For older garages (especially pre-1930s) or those showing significant wear and tear, you might find it’s actually more cost-effective to demolish and rebuild rather than trying to retrofit the existing structure. A good structural engineer will help you make this important decision.
Want more detailed information about permits in your specific area? Check out our comprehensive guide on ADU permits in California.
Key Regulations for a Successful Garage to ADU Conversion
Understanding the rules of the game makes winning much easier. When it comes to your garage to ADU conversion, knowing the regulatory landscape will help you avoid costly mistakes and delays.
California has become increasingly ADU-friendly in recent years. Several important laws (AB 68, AB 881, and SB 13 passed in 2019) have streamlined approvals and removed many barriers to ADU development. The California Government Code Sections 65852.2 and 65852.22 establish statewide standards that local jurisdictions must follow. One particularly helpful provision prohibits owner-occupancy requirements for ADUs until January 1, 2025, giving you flexibility in how you use your property. Additionally, local building departments now must review complete ADU applications within 60 days.
While state law provides the framework, your local city or county may have specific requirements worth noting. These might include height limitations (typically capped at 16 feet for detached structures), design standards to ensure your ADU matches your primary residence, utility connection fees, and specific fire access requirements. Knowing these local nuances early can save you headaches later.
When you’re ready to submit your permit application, you’ll need several key components. Your package will typically include a site plan showing your garage location and setbacks, detailed floor plans with dimensions, elevation drawings showing what the exterior will look like, structural plans including foundation details, Title 24 energy calculations, plus mechanical, electrical, and plumbing plans. Don’t forget to include fire safety compliance documentation as well.
If you’re in San Francisco, a great place to start is the city’s official ADU information portal, which provides property-specific guidance.
An important distinction to understand: whether your existing garage is already a permitted structure makes a big difference in your conversion process. Permitted garages can typically be converted through a change-of-use permit, while unpermitted structures may need to meet full new construction standards. The good news is that as of 2023, unpermitted work doesn’t automatically need to be removed before building an ADU unless it poses a health or safety risk.
As you plan your conversion, be prepared to address some common compliance issues. Your new living space will need minimum ceiling heights of 7 feet, properly sized egress windows for emergency escape, adequate ventilation and natural light, a separate exterior entrance, and either separate or properly connected utilities.
Working with professionals who understand local ADU regulations can be worth every penny. At ADU Marketing Pros, we connect homeowners with architects and contractors who specialize in navigating these complex regulations throughout California.
Timeline & Paperwork for Your Garage to ADU Conversion
Patience is a virtue when it comes to the permitting process for your garage to ADU conversion. Understanding the typical timeline can help you set realistic expectations and plan accordingly.
The plan check process begins with your initial submission package. You’ll gather all required documents and submit them to your local building department. The initial review typically takes 2-8 weeks, depending on your location and how busy the department is. Don’t be discouraged if you receive a correction notice—this is normal! You’ll need to address any requested changes or provide additional information, then resubmit. This back-and-forth can take another 2-4 weeks. All told, most garage conversion permits take about 2-4 months from initial submission to final approval.
If your property is in a historic district or has historic designation, prepare for some additional problems. You’ll likely face additional design review requirements and possible restrictions on exterior modifications. The approval timeline might extend by 1-2 months, and you may need to maintain certain original façade elements. The extra effort is worth it, though, as these conversions often result in uniquely charming spaces.
The good news is that many jurisdictions now offer streamlined processing specifically for garage conversions. Some cities have pre-approved plans that can cut review time in half. A few even offer over-the-counter permits for simple conversions. Many building departments now have online permit tracking systems so you can monitor your progress, and some offer expedited reviews for an additional fee if you’re in a hurry.
Once your permit is approved and construction begins, plan for several key inspection milestones. These typically include foundation/slab inspection (if modifications are needed), rough framing, rough electrical/plumbing/mechanical, insulation, drywall, and finally, a comprehensive final inspection before you receive your certificate of occupancy.
To keep your permit process moving as smoothly as possible, submit digital plans where accepted for faster processing, respond promptly to any correction requests, include all required calculations and reports with your initial submission, and consider hiring a permit expediter if your project is particularly complex.
Be aware of potential delay factors. The number one cause of delays is incomplete submissions, so double-check everything before you submit. Other common slowdowns include staff shortages in building departments, seasonal permit volume fluctuations (spring and summer are typically busiest), utility connection approvals, and special district reviews for coastal or wildfire zones.
In the San Francisco Bay Area, we typically recommend allowing 3-4 months for the permitting process. Los Angeles is a bit faster at 2-3 months with their streamlined approvals, while San Diego averages 2-4 months depending on which specific jurisdiction you’re in.
As for costs, permit fees vary widely by location and project scope, but typically range from $2,000-$5,000 for a standard garage conversion in California.
Utilities & Safety Requirements
Changing your garage into comfortable living space requires careful attention to utilities and safety features. These systems are the unsung heroes of your garage to ADU conversion, ensuring your new space is cozy, functional, and code-compliant.
When it comes to water and sewer connections, most conversions require new water supply lines, typically 3/4″ minimum diameter. Your sewer connections may need upgrading or adding as well. If you’re planning to rent your ADU, consider installing separate water meters to track usage independently. These plumbing upgrades typically cost between $5,000-$15,000 depending on distance and complexity. California code requires water-efficient fixtures, which will help keep utility bills manageable for you or your tenants.
Electrical systems are another crucial consideration. Most garage conversions require a new electrical subpanel (100 amp minimum) to handle the increased demand. You’ll need to have load calculations performed to ensure adequate service, with dedicated circuits for major appliances, HVAC systems, and lighting. Kitchens and bathrooms require GFCI protection for safety. While you’re updating electrical, consider future needs like electric vehicle charging capability—this forward-thinking approach can add value to your property.
If gas service is available in your area, you might need to extend or upgrade gas lines. However, many new ADUs are going all-electric with induction cooking and heat pumps, which can be more energy-efficient and environmentally friendly. If you do use gas, shutoff valves must be accessible and properly located. When making your decision, weigh both the upfront cost difference and the long-term operational costs of gas versus electric appliances.
Fire sprinklers are generally not required if your main residence doesn’t have them, which is good news for your budget. However, they may be mandatory if your ADU is part of a multi-family property, or if your local fire department has specific requirements. If sprinklers are needed, budget approximately $4-$7 per square foot for installation.
Safety features like proper egress are non-negotiable. Bedroom windows must meet minimum size requirements to allow emergency escape, doors need to be at least 32″ wide and 80″ tall, and smoke and carbon monoxide detectors are required throughout. All rooms must have minimum ceiling heights (typically 7 feet), and bathrooms require ventilation through either a window or mechanical fan.
Your new living space must comply with California’s Title 24 energy standards, which specify insulation requirements for walls (R-15 to R-21), ceilings (R-30 to R-38), and floors (R-19). You’ll need high-efficiency windows with proper U-factor and Solar Heat Gain Coefficient ratings. LED lighting and energy-efficient appliances aren’t just good for the planet—they’ll save money on utility bills too. Consider exceeding these minimum requirements for improved comfort and long-term savings.
For heating and cooling, mini-split heat pump systems have become the popular choice for ADUs. They’re efficient, quiet, and don’t require extensive ductwork, making them perfect for conversions. Proper ventilation is essential for maintaining good indoor air quality, and ceiling fans can improve comfort while reducing energy usage. Make sure your heating system has adequate capacity for winter conditions in your specific climate zone.
By addressing these utility and safety requirements early in your planning process, you’ll avoid costly changes during construction. At ADU Marketing Pros, we’ve seen that thoughtful planning for utilities is one of the key factors in successful garage to ADU conversions throughout California.
Design & Construction Roadmap
Creating a thoughtful design and following a clear construction roadmap are essential for a successful garage to ADU conversion. This phase transforms your vision into reality while addressing practical considerations:

When planning your space, size matters. For a comfortable studio ADU, you’ll want at least 360 square feet (about the size of a typical two-car garage). If you’re dreaming of a one-bedroom layout, aim for 420-450 square feet minimum. Standard room dimensions too—bathrooms need about 5’×8′ and bedrooms should be at least 8’×10′ to feel comfortable, not cramped.
Open-concept designs work wonders in smaller spaces, creating an airy feel even when square footage is limited. As you sketch out your layout, prioritize functional zones for sleeping, living, cooking, and bathing. Each area should flow naturally into the next without wasted space.
Proper insulation and moisture control are non-negotiable in garage to ADU conversions. Most garage slabs weren’t built with living spaces in mind, so you’ll likely need moisture barriers before installing flooring. Products like Dricore or Drytek can be lifesavers for retrofit moisture control. For walls, don’t skimp—while R-15 insulation meets minimum requirements, R-21 will make your space noticeably more comfortable year-round. Ceilings should have R-30 to R-38 insulation to keep your energy bills manageable.
When it comes to heating and cooling, ductless mini-split systems have become the go-to for garage conversions. These efficient units provide both heating and cooling without requiring extensive ductwork. Just be careful not to oversize your system—contrary to what you might think, bigger isn’t better. An oversized unit will cycle on and off too frequently, wasting energy and providing less consistent comfort.
Choosing sustainable materials isn’t just good for the planet—it makes for healthier living too. Low-VOC paints and finishes improve indoor air quality, while durable options like luxury vinyl plank flooring offer longevity at a reasonable $3-5 per square foot. Energy Star appliances and LED lighting throughout will keep your utility bills in check for years to come.
Your construction will typically follow this sequence: first demolition of non-structural garage elements, then foundation repairs if needed, followed by framing modifications and structural upgrades. Next comes the “rough” stage—electrical, plumbing, and mechanical installation—before insulation and moisture barriers are added. Drywall installation and finishing precede flooring, which is followed by cabinet and fixture installation. The process wraps up with finish electrical and plumbing work, then final touches and cleanup.
For more inspiration on creating a beautiful and functional space, check out our guide on ADU Design Trends.
Structural & Fire Upgrades Made Simple
Converting a garage into a habitable space requires specific structural and fire safety upgrades to meet building codes. While these technical aspects might seem daunting, breaking them down into manageable components makes the process more approachable:
Most garage foundations weren’t designed for living spaces. Typical garage slabs are only about 4″ thick and often need reinforcement to support residential use. In most California jurisdictions, foundations must extend at least 12″ below grade—something many older garages don’t have. Foundation underpinning options include perimeter reinforcement with additional concrete, helical piers for problematic soils, or slab overlays with proper connections to existing foundation. Budget between $8,000-$20,000 for this work, depending on what your specific garage needs.
Shear walls are your ADU’s defense against California’s seismic activity. These specially designed walls resist lateral forces from wind and earthquakes and are typically constructed with plywood or OSB over framing. They’re especially critical on walls perpendicular to where the garage door opening used to be. Your contractor might need to install new hold-downs anchored to the foundation to make these walls effective.
Fire safety isn’t something to cut corners on. If your garage walls sit within 5 feet of property lines, they’ll typically require a 1-hour fire rating. This is achieved with 5/8″ Type X fire-resistant gypsum board—not your standard drywall. Proper sealing of all penetrations (like outlets and pipes) is critical, and fire blocking will be required in wall cavities. These measures might seem excessive, but they can literally be lifesavers.
Looking up, your garage roof may need attention too. Most garage roofs weren’t designed to support the insulation needed for comfortable living spaces. You might need additional ceiling joists or reinforcement of existing ones. If you’re dreaming of vaulted ceilings, be prepared for specific engineering requirements. And don’t forget about proper roof-to-wall connections—hurricane ties are often needed to bring these up to current code.
Windows and doors in your new ADU need to meet specific requirements too. Bedrooms require egress windows with a minimum 5.7 square foot opening—enough for a firefighter with gear to enter or for you to escape in an emergency. Bathrooms and windows near doors need tempered glass for safety. And all exterior doors need proper flashing and weatherproofing to keep the elements out.
In earthquake-prone California, seismic upgrades are particularly important. Where your garage door once was, you might need moment frames to provide structural integrity. Proper connections between walls and foundation, reinforcement at corners, and shear transfer details at floor-to-wall connections all help your ADU withstand the next tremor.
Working with a structural engineer experienced in garage to ADU conversions is money well spent. They’ll identify exactly what your specific project requires, potentially saving you from both overbuilding and costly mistakes. While these improvements add to your budget, they ensure the safety and longevity of your investment—something we at ADU Marketing Pros have seen pay dividends for countless homeowners.
Maximizing Every Square Foot
When converting a garage into an ADU, making the most of limited space becomes an art form. Here are proven strategies to maximize functionality in your garage to ADU conversion:
Smart storage solutions can transform a compact space into a highly functional home. Custom cabinets that extend all the way to the ceiling capture otherwise wasted space—those extra inches add up! Platform beds with built-in drawers underneath eliminate the need for separate dressers, while window seats with storage compartments serve double duty as both seating and storage. Even your bathroom can work harder for you with recessed medicine cabinets and shower niches that don’t intrude into the room.
Vaulted ceilings can make a world of difference in how spacious your ADU feels. By following the natural slope of your garage roof, you create a sense of openness that flat ceilings simply can’t match. In taller garages, this extra height might even allow for a loft sleeping area, effectively adding usable square footage without expanding the footprint. Vaulted spaces also provide room for clerestory windows above standard wall height, bringing in additional natural light without sacrificing privacy.

Speaking of light, thoughtful daylighting strategies can make your ADU feel significantly larger. Skylights bring natural illumination deep into the space, while light tubes offer a more budget-friendly alternative where traditional skylights aren’t feasible. Glass doors not only maximize light but also provide visual and physical access to outdoor areas, effectively expanding your living space. Light colors and reflective surfaces throughout the ADU will amplify whatever natural light is available, creating a brighter, more open-feeling environment.
Multi-functional furniture is a game-changer in small spaces. Murphy beds that convert to desks or dining tables during the day reclaim valuable floor space when not in use. Expandable dining tables accommodate occasional guests without hogging space day-to-day. Sofa beds provide flexible sleeping arrangements for visitors without dedicating precious square footage to a rarely-used guest room. Even simple choices like nesting tables can make a difference—pull them apart when needed, then tuck them together when not in use.
Your appliance choices can free up significant space without sacrificing functionality. Consider 24″ refrigerators instead of standard 30-36″ models—they hold plenty for one or two people while saving valuable inches. Dishwashers come in 18″ or 24″ widths too. Compact washer/dryer combos or stackable units tuck into closets, while two-burner cooktops or induction models provide ample cooking capacity with a smaller footprint. Microwave-convection oven combinations eliminate the need for separate appliances.
Visual expansion techniques can make your ADU feel larger than its actual dimensions. Continuous flooring throughout creates flow without visual breaks that can make spaces feel chopped up. A consistent color palette helps maintain this sense of continuity. Strategic mirror placement effectively doubles the perceived space, while glass shower enclosures feel more open than curtains. Consider pocket doors or sliding doors instead of swing doors—they don’t require clearance space to open and close.
Don’t forget about the outdoor connection. French doors or sliding glass doors can extend your living space outdoors, making even a tiny patio feel like an additional room. Container gardens add greenery without sacrificing space, while outdoor storage solutions keep seasonal items from cluttering your interior. Even a small, weather-protected entry area creates a valuable transition space between indoors and out.
By implementing these strategies, even a modest 400 sq ft garage can be transformed into a comfortable, functional living space. We’ve seen clients throughout San Jose and the Bay Area create stunning ADUs in spaces that initially seemed too constrained for comfortable living.
Attached vs Detached—Pros, Cons & Cost Drivers
When undertaking a garage to ADU conversion, one of the fundamental considerations is whether you’re working with an attached or detached garage. Each configuration presents distinct advantages, challenges, and cost implications:
Converting an attached garage offers several compelling benefits. You’ll generally face lower utility connection costs since you’re closer to existing systems, and it’s often easier to integrate with the main house’s HVAC and electrical. The permitting process tends to be simpler, and you might even be able to create internal access between the main house and ADU—perfect if you’re housing an aging parent who needs occasional assistance. Best of all, attached conversions typically cost about 10-15% less than comparable detached projects.
However, attached conversions come with their own challenges. Sound transmission between units can be a significant issue—nobody wants to hear every footstep or conversation from the adjacent space. Privacy becomes a consideration for both the main house and ADU occupants. You may also face limitations in design flexibility due to the existing house constraints, and there are potential complications with fire separation requirements that must be addressed.
The main cost drivers for attached conversions include sound insulation (expect to add $2,000-$4,000 for proper soundproofing), fire-rated wall assemblies between units, and possibly separate HVAC systems if required by code or comfort considerations. Roof tie-ins can get complicated, and you’ll likely need to match exterior finishes for visual continuity with the main house.
Detached garage conversions, on the other hand, offer maximum privacy for both the main house and ADU occupants—a significant advantage if you’re planning to rent out the space. You’ll enjoy greater design flexibility and independence, with no concerns about sound transmission between the ADU and main house. These conversions allow for a distinct architectural identity and often create opportunities for pleasant outdoor space between structures.
The downsides? Detached conversions typically cost more—about 10-20% higher than attached projects of similar size. This price difference comes primarily from higher utility connection costs for water, sewer, and electrical, which can run $5,000-$15,000 for trenching and connections alone. You’ll need an independent HVAC system, separate electrical service or subpanel, and possibly a dedicated water heater. There’s also more extensive site work required between structures.
Whether attached or detached, sound-proofing deserves serious attention. Effective strategies include installing resilient channels between framing and drywall, using double layers of drywall with acoustic sealant between them, and incorporating insulation specifically designed for sound attenuation. Solid-core doors and acoustic window treatments make a noticeable difference, as does thoughtful placement of bathrooms and kitchens away from quiet areas.
Privacy improvements might include strategic window placement to avoid direct sightlines, landscaping buffers between units, separate outdoor living spaces, and private entrances oriented away from the main house. Even simple solutions like frosted glass can provide light without sacrificing privacy.
Roof integration can be particularly challenging, especially with attached conversions. You’ll need to match existing rooflines and materials, ensure proper flashing and waterproofing at connections, and consider snow and rain runoff patterns. Structural support for existing roof modifications may be necessary, though this sometimes creates opportunities for additional skylights or solar tubes.
Your yard will inevitably be impacted, so plan accordingly. Consider access pathways to both structures, drainage patterns, landscaping opportunities between buildings, outdoor living space allocation, and parking considerations.
At ADU Marketing Pros, we’ve observed that attached garage conversions in the Bay Area typically run about $110,000-$140,000, while detached conversions average $120,000-$165,000 for similar square footage. The choice between attached and detached often comes down to your specific property layout, budget constraints, and intended use of the ADU.
Budget, Financing & ROI
Let’s talk money. When you’re planning a garage to ADU conversion, understanding the financial picture is essential—not just for budgeting, but for seeing the true value of your investment.
Most homeowners are pleasantly surprised to learn that garage conversions are one of the most cost-effective ways to add living space to your property. Unlike building from scratch, you’re leveraging existing structure, which translates to significant savings.
A basic 400-square-foot garage conversion typically runs between $100,000-$130,000 in California markets. If you’re looking for higher-end finishes or tackling a more complex project, expect to pay $130,000-$165,000. For luxury conversions with premium materials and fixtures, the range jumps to $165,000-$250,000. And if you’re ambitious enough to add a second story over your garage? Budget $250,000-$350,000.
Beyond construction costs, don’t forget to account for what we call “soft costs”—these are easy to overlook but add up quickly. Architectural and engineering plans will run $8,000-$15,000, permit fees another $2,000-$5,000, and you’ll need to budget for Title 24 energy calculations ($500-$1,500) and structural engineering ($2,500-$5,000). Some projects require property surveys ($1,500-$3,000), and good project management (worth every penny) typically adds 10-15% to your total.
Utility upgrades often surprise first-time ADU builders. Your existing garage probably wasn’t designed for full-time living, so you might need an electrical panel upgrade ($2,500-$4,500), new water service ($3,000-$8,000), sewer connection ($5,000-$15,000), or gas line extension ($1,500-$3,000). If you’re planning to rent out your ADU, separate utility meters ($2,000-$3,000) might be worth considering.
Now for the good news—the potential return on your investment is impressive. In most California markets, studio ADUs rent for $1,300-$2,200 monthly, while one-bedrooms command $1,800-$3,500. This typically translates to a 6-10% annual ROI, with most projects reaching the break-even point in just 5-7 years. Even better, ADUs typically add more value to your property than they cost to build, making them a smart long-term investment.
When it comes to financing your garage to ADU conversion, you have several options. Many homeowners tap into their equity through a cash-out refinance or HELOC (Home Equity Line of Credit). Construction loans and renovation-specific options like FHA 203k or Fannie Mae HomeStyle loans are designed for exactly these types of projects. California residents should also look into the state’s ADU Grant Program, which offers up to $40,000 for pre-construction costs for qualifying homeowners.
What about property taxes? In California, thanks to Proposition 13, only the improvement value gets reassessed, not your entire property. This typically means an annual increase of $1,000-$2,000 for a standard conversion—far less than the potential rental income. Plus, if you’re using the ADU as a rental property, you may benefit from depreciation deductions come tax time.
For more detailed information about construction costs specific to ADUs, check out our comprehensive guide on ADU Construction Cost.

| Feature | Garage Conversion ADU | New Detached ADU |
|---|---|---|
| Average Cost (400 sq ft) | $130,000 | $240,000+ |
| Cost per Square Foot | $325-$400 | $500-$600 |
| Timeline | 3-6 months | 9-14 months |
| ROI Timeline | 5-7 years | 8-12 years |
| Permitting Fees | $2,000-$5,000 | $5,000-$10,000 |
| Foundation Work | Minimal (upgrades only) | Complete new foundation |
| Utility Connections | Extend existing | New connections |
According to Angi’s cost guide, “Garage conversions can add valuable living space at a fraction of the cost of building an addition. Homeowners can expect to pay between $20,000 and $50,000 for a basic conversion, but costs can rise significantly with high-end finishes and structural modifications.” However, our experience in California markets shows costs typically starting higher due to stringent building codes and higher labor costs.
The bottom line? A garage to ADU conversion is one of the smartest investments you can make in your property. Not only does it create valuable living space for family members or rental income, but it also builds equity and provides flexibility for your changing needs over time. When you consider the relatively quick payback period compared to other home improvements, it’s easy to see why so many California homeowners are changing their underused garages into comfortable, functional living spaces.
Frequently Asked Questions about Garage to ADU Conversion
How much will my conversion cost and how can I fund it?
Wondering about the price tag for your garage to ADU conversion? You’re not alone—this is often the first question homeowners ask us.
In California, most conversions typically run between $100,000 and $165,000 for a standard 400 square foot unit. Your specific cost will depend on several factors that make each project unique: the size and current condition of your garage, the quality of finishes you select (basic vs. luxury), structural upgrades needed, utility connection complexity, and even your location’s labor costs.
When it comes to funding your new ADU, you’ve got several solid options to explore:
A cash-out refinance often provides the lowest interest rate if you’ve built up substantial equity in your home. Many of our clients in San Jose find this approach straightforward and cost-effective.
If you prefer flexibility, a Home Equity Line of Credit (HELOC) allows you to draw funds as needed throughout construction—perfect if you’re the type who likes to make decisions as you go.
Construction loans are specifically designed for renovation projects like yours and typically convert to permanent financing once your ADU is complete.
Some homeowners take a phased approach, using a small cash-out refinance to cover design and permitting costs, then securing construction financing once plans are approved and they’re ready to build.
If you’re on a tighter budget, check out the CalHFA ADU Grant Program, which provides up to $40,000 in pre-construction assistance for qualifying low to moderate-income homeowners.
The best part? Many of our clients find that rental income from their completed ADU covers their additional monthly mortgage payment, making the project cash-flow positive from day one.
Do I need replacement parking after converting the garage?
Here’s some genuinely good news for California homeowners: As of January 2020, state law explicitly prohibits cities and counties from requiring replacement parking when you convert a garage to an ADU.
This change has been absolutely game-changing for garage to ADU conversions. It means you can transform your garage without adding new parking spaces anywhere on your property. Local jurisdictions cannot override this state provision, and it applies to both attached and detached garage conversions—even in neighborhoods where street parking is limited.
There are a few important distinctions worth noting, however. This parking exemption applies specifically to full ADUs, not necessarily to Junior ADUs (JADUs). Also, if you’re expanding beyond your existing garage footprint, standard ADU parking rules may apply to the new portions. Some historic districts might have special considerations, and while HOAs may have separate parking requirements, their ability to restrict ADUs has been significantly limited by state law.
This parking exemption has made conversions possible in dense urban areas where adding replacement parking would have been difficult or impossible—opening up opportunities for thousands of homeowners who previously couldn’t consider this option.
What’s the process for legalizing an unpermitted garage?
Finded that your garage was built without proper permits? Don’t worry—you’re in good company. Many California homeowners find themselves in this situation, often because previous owners made unpermitted modifications. Fortunately, there’s a clear path forward.
Start with a thorough assessment of what you’re working with. Hiring a structural engineer to evaluate the existing construction is money well spent. They’ll help you document current conditions and determine which elements meet current code and which need attention. Good news: as of 2023, unpermitted work doesn’t necessarily need to be removed unless it poses a safety risk.
Next, prepare your submittal package. You’ll need to create as-built drawings of the existing structure and develop plans showing necessary modifications to meet current codes. Include structural calculations for any reinforcement needed and Title 24 energy calculations for the conversion.
The permitting process for legalization projects often involves additional scrutiny and possibly higher fees than standard permits. Some jurisdictions offer amnesty programs with reduced penalties, but be prepared to pay retroactive permit fees in many cases. Transparency with building officials usually yields the best results.
During construction and inspections, you’ll make all required modifications to meet current codes and schedule inspections for each phase of work. Document compliance carefully and address any additional issues identified during inspections promptly.
Finally, obtain final approval through completed inspections of all building systems and request a Certificate of Occupancy for your new ADU. Don’t forget to update your property records with the county assessor and consider having the property re-appraised for insurance purposes.
While legalizing an unpermitted garage might seem daunting, it’s usually significantly less expensive than demolishing and rebuilding from scratch. Many of our clients in Los Angeles and San Diego have successfully converted unpermitted garages into legal, safe, and valuable ADUs that provide both peace of mind and additional income.
Conclusion
Changing your garage into an ADU isn’t just a renovation project—it’s a doorway to new possibilities for your property and family. As we’ve seen throughout this guide, a garage to ADU conversion represents one of the smartest investments California homeowners can make today, offering returns that few other home improvements can match.
The ADU movement continues to gain momentum across California, fueled by supportive legislation and a growing recognition of their value. For you as a homeowner, this presents multiple opportunities that work together to improve your property’s utility and worth.
Think about how your converted garage could serve your family across different life stages—perhaps initially as rental income to help pay down your mortgage, later as a space for aging parents to maintain independence while staying close, or even as a landing pad for adult children navigating today’s challenging housing market.
We’ve watched with excitement as these conversions have transformed properties throughout San Jose, Los Angeles, and the Bay Area. The numbers tell a compelling story: a well-executed garage to ADU conversion typically pays for itself within 5-7 years through rental income, while simultaneously boosting your property’s long-term value.
From a real estate perspective, homes with ADUs have become increasingly attractive to buyers who recognize their flexibility and income potential. This is especially true in competitive housing markets like San Francisco, where that additional living space can significantly improve a property’s appeal and marketability.
For those in the architecture and construction fields, understanding the unique challenges and creative opportunities that garage conversions present is becoming essential knowledge. The professionals who excel in this growing niche combine technical expertise with innovative space-maximizing solutions that transform humble garages into comfortable, beautiful living spaces.
As you consider your own garage to ADU conversion, thoughtful planning, quality design, and proper permitting form the foundation of a successful project. Investing in professional guidance often saves money in the long run through a smoother process and superior results that stand the test of time.
Ready to take the next step in your ADU journey? Learn more about how targeted marketing can help ADU professionals connect with qualified homeowners through our guide on ADU PPC campaigns.
ADU Marketing Pros—helping builders & architects capture qualified ADU leads through data-driven SEO and PPC strategies.